
Looking for Automatic Chicken Waterer Parts List?
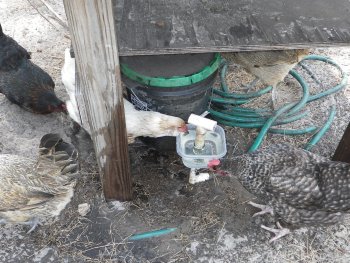
This is what makes this Chicken Waterer unique. You can remove the bowl, wash it, replace it, or then put it back. It also makes it so that it can be upgraded or changed, if it is not working like it needs to for whatever you are trying to provide water to. Chickens need clean water.
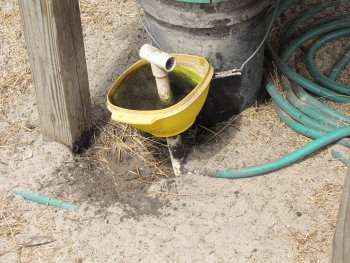
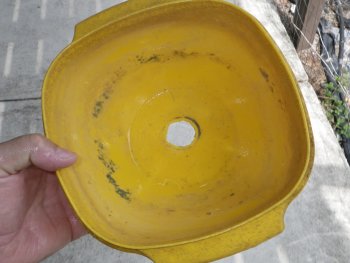
This chicken waterer has been cleaned out a couple of times since it was installed about a year ago. Mostly by just swishing out the dirt. Sometimes the bowl would come off the waterer so that the dirt could be washed out. There is only dirt in here, and it is from the chickens having it on their beaks. It was placed under a shade maker so they would not try to roost on it. It seemed to work, as there has not been any poop in it so far. This has worked out very well as we have not had to “worry” about the water. Of course, we still feed and collect eggs every day, but this has really helped.
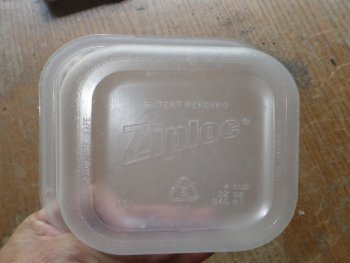
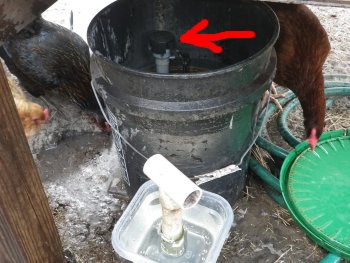
This is an ordinary container. It has a little height to it, and also some width. It just needs enough to hold the depth of water for the toilet fill valve to spread, around 3″ or so. Then it needs to be wide enough for the chickens to get their head in and around the fill pipe.
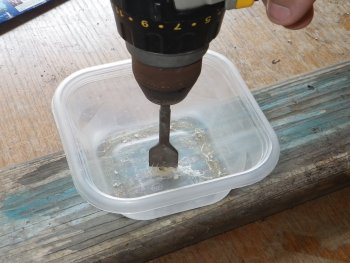
The 1 inch paddle bit is the perfect size to drill the hole for the cup to change out for the chicken waterer. Using 3/4″ thread, the one inch hole fits it perfectly. The paddle bit will drift, so go slow. The drilling creates heat and starts melting the plastic. Notice there is a board underneath. This helps stabilize the bowl, but it still wants to drift.
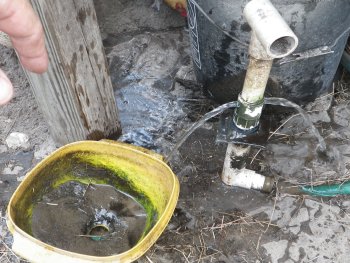
Unscrew the Chicken Waterer T-handle and remove the existing bowl from the chicken waterer system. Let the system flush and rinse it off as desired. Having the other bowl or cup ready will limit the waste of water. It is good to flush the system out anyway.

As you can see, the top of the water line has changed, due to the different size of the chicken waterer cup. This can be tackled with some adjustments to the toilet fill valve.
There is an adjustment screw, or a holding clamp to adjust the depth of the float. If the water is overflowing, you want the float to go down so it will turn off sooner. It may only take a little to get it to turn off where you want it.
The chicken waterer bowl is installed and is clean as a whistle. Now this bowl can serve as a spare when the other bowl is being cleaned.
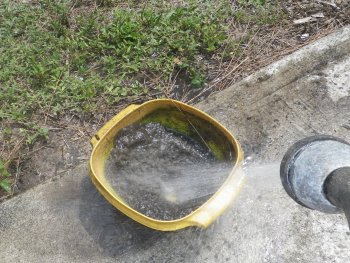
Wash out all the dirt from the old bowl.
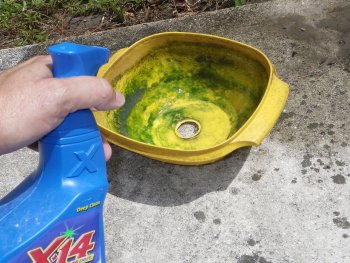
Any mold and mildew cleaner has a little chlorine in it, which will kill the algae. This is a good way to have two chicken waterer bowls that are real easy to change out and clean.
Now the chicken waterer bowl is nice and clean, ready for the next step.
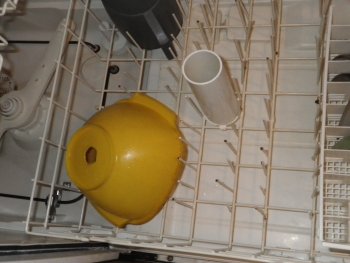
One more step will assure this chicken waterer bowl is ready to continue service. You can never be too sure. Now there are two chicken waterer bowls to switch out whenever it does get dirty. Anytime the water is in the sun, it is going to get algae in it after a while.